.ico)

Hadoop Installation
Virtual machine configuration
- RAM: 4 GB
- Disk: 100 GB (only uses what it needs)
Hadoop consists of four functional layers of software. Each component will have different versions. But they are all tested to work together when a version of Hadoop is released. This is important to understand as each Hadoop component is installed, component by component. This includes:
- Common
- HDFS
- YARN
- MapReduce
When performing a Hadoop installation, it is imperative to follow these steps:
- Install software using yum
- Configure the file system
- Configure the environmental variables
- Configure the configuration files, primarily .xml files
- Configure support, such as MySQL or Tomcat
- Conduct validation and testing
- Configure documentation
File System Layouts (Best Practices)
yum will attempt to install the software in /usr/bin and then create the other directories for you.
- Code base:
/usr/lib/[component] - Configuration files:
/etc/[component]/conf - Data files:
/var/db/[component] - Log files:
/var/log/[component] - Pid files:
/var/run/[component]
[component] is one of the four Hadoop components listed above. For instance, HBase will be loaded into /usr/lib/hbase.
Training Layout
A symbolic link will be used to the code base /usr/local/opt.
The working directory will be /home/hduser/[component]
- conf:
/etc/[component].conf - data:
/var/data/[component] - log:
/var/log/[component] - run:
/var/run/[component] - scripts: locally written scripts for hive, pig, etc.
- src: source code
Hadoop creates a user and group for every component of the ecosystem.
This adds a level of complexity, but also increases security and management
in a production environment. For training purposes, we will install all
components as hduser with a group of hadoop.
chown -R hduser:hadoop directories/files
Hadoop has three installation modes:
- Standalone Mode: A single installation on a laptop, used to test code, does not simulate a cluster
- Pseudo-Distributed Mode: Running Hadoop in a cluster of one node
- Distributed Mode: Full scale cluster up to thousands of nodes
Hadoop relies on a number of environmental variables being set.
- .bashrc: File setting the path to the binaries
- hadoop-env.sh: Files exporting the environmental variables
- log4j.properties: Files configuring log outputs
Configuring Hadoop is complicated. Hadoop configuration files constist of xml files.
- core-site.xml
- hdfs-site.xml
- yarn-site.xml
- mapred-site.xml
Nearly all of the xml files use a standard xml layout.
<configuration>
  <property>
    <name>property name</name>
    <value>property value</value>
    <description>property description</description>
  </property>
</configuration>
The Hadoop Ecosystem creates many Java virtual machines (JVM), each with its own memory requirement. Additional RAM will also prevent swapping to disk.
A base Hadoop install requires about 12.5 GB of disk space. It is necessary, however, to determine the disk size on your estimate of the size of your sample size.
Useful Links
adduser hduser
Create a user ID by using the adduser command.
sudo adduser hduser
Set the passwords for this account.
passwd hduser
Now log into the hduser account.
JDK
A Java Developer Kit, or JDK, is required to run Hadoop. Either the JDK from Oracle or the OpenJDK will work.
Additional libraries will be required for development software. This includes the following:
- ant
- gcc
- libxml2-devel
- libxslt-devel
- libsqlite3-devel
- libldap2-devel
- maven
- python2.6-devel
- python-pip
We need to check out login shell to make sure it call the bash runtime file. Open a terminal and type:
vi .bash_profile
Note: The .bash_profile file is executed in a interactive login. The .bashrc file is executed in a non interactive login.
This will open the file that will be similar to this:
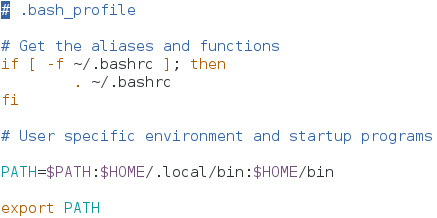
We can see that the .bashrc script file is being called by
this .bash_profile script. This is evident by the .
~/.bashrc line. This is to be expected. So let's close the
.bash_profile script with no modifications (:q) and open the
.bashrc script file.
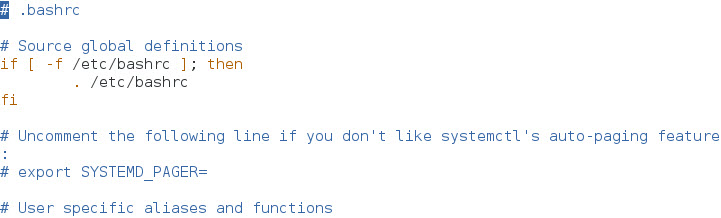
vi .bashrc
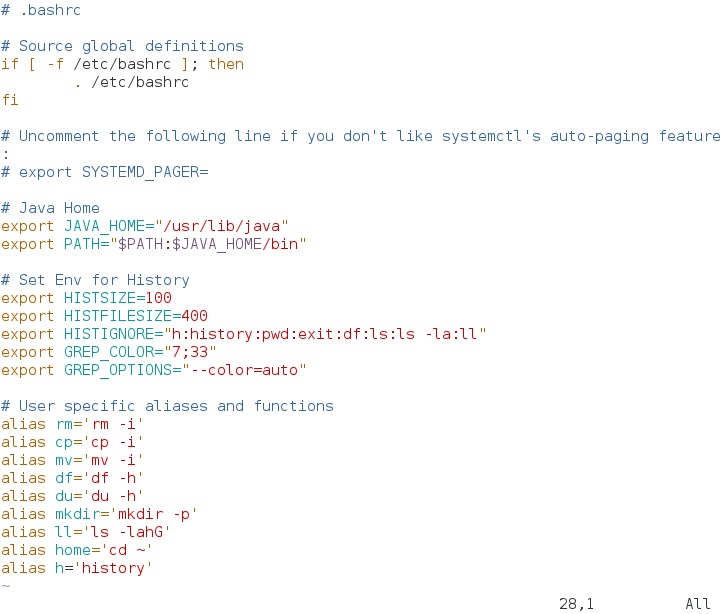
This will open the file that will be similar to this:
Modify the .bashrc file so it includes to following History
exports and aliases:
Close the .bashrc script file by saving it and quiting the
editor (:wq). Now we need to source the .bash_profile
script file to pick up the changes:
source .bash_profile

To verify that the changes have been picked up, use the alias command to check:
alias
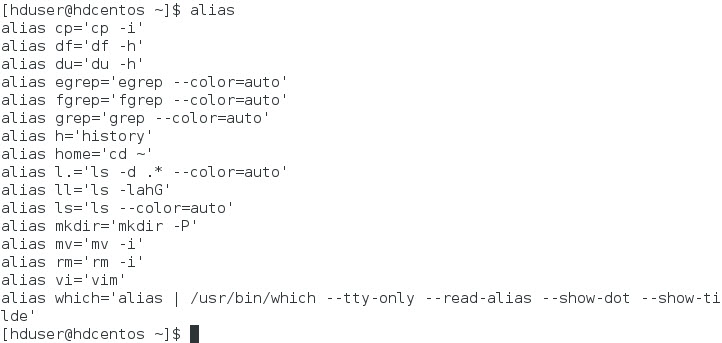
It appears that we are now using the current .bashrc file.
repo
Now that we have configured our shell, we need to configure the right repository, refered to as a repo, for our Hadoop installation. We will be using Hortonworks for this installation. You will always want to use the latest stable version. Use the curl command to download the repo file from the hortonworks website.
cd /home/hduser/Downloads
sudo curl -O public-repo-1.hortonworks.com/HDP-2.1.0.0/repos/centos6/hdp.repo

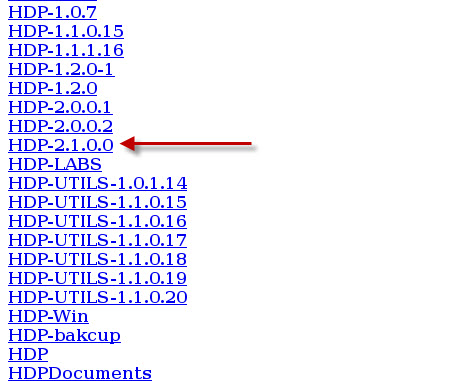
This command is going out to the hortonworks database to download the repo file. To find this file view the web browser, use the following URL in your Linux browser: public-repo-1.hortonworks.com. Click on Repository Home to retrieve a list of repositories.

We need the yum repo file. So scroll down for the HDP-2.1.0.0 link and click.
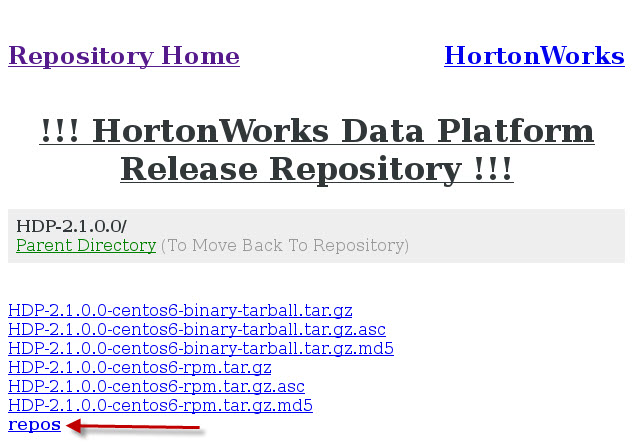
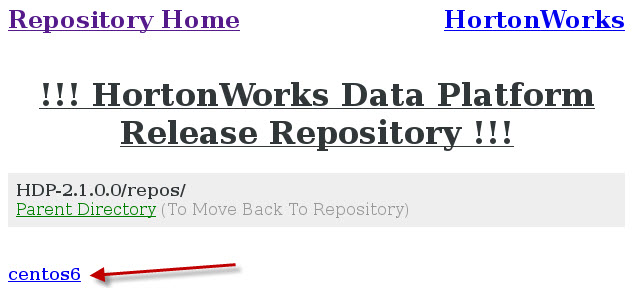
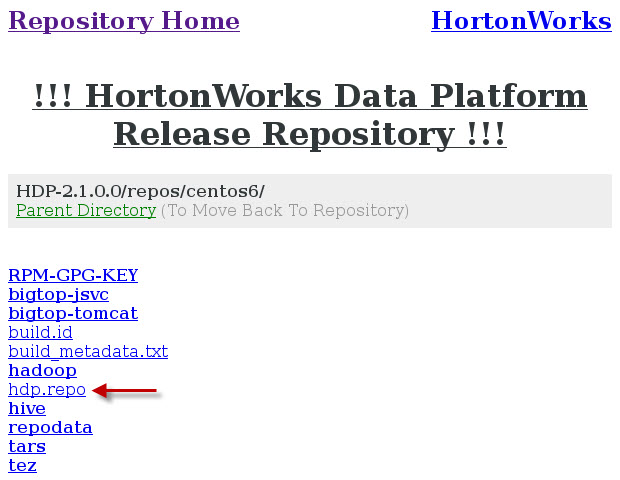
We have successfully downloaded the repo file. We will now move this file
into place. It needs to be in the /etc/ym.repos.d directory. Move the file with the following command:
sudo mv /home/hduser/Downloads/hdp.repo /etc/yum.repos.d
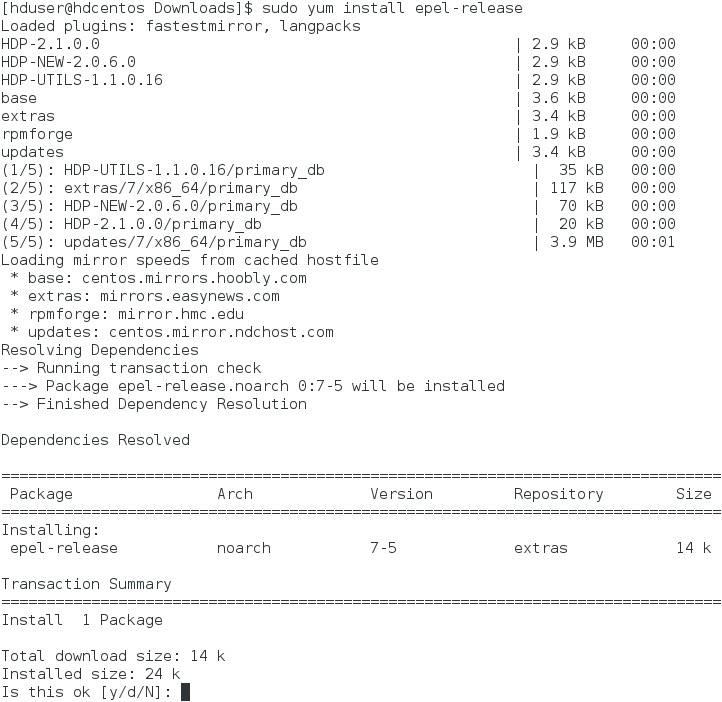
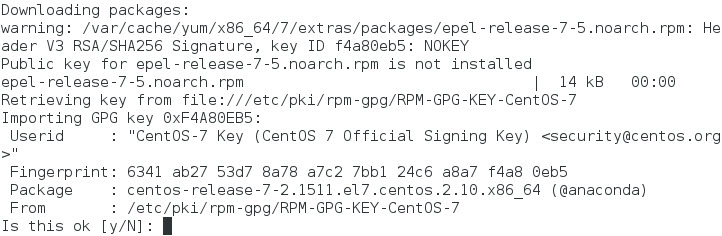
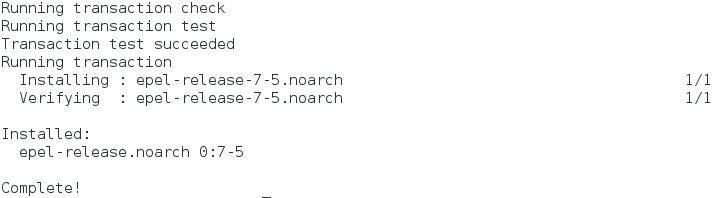
Next, install EPEL tools:
sudo yum install epel-release
Next, list the repo list:
sudo yum repolist enable

sudo yum search hadoop
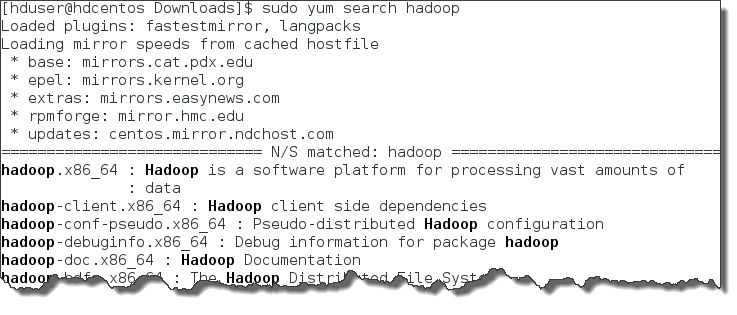
This command should list numerous messages that indicate that we have access the packages that make up Hadoop. Let's check to make sure that Hive is also available:
sudo yum search hive
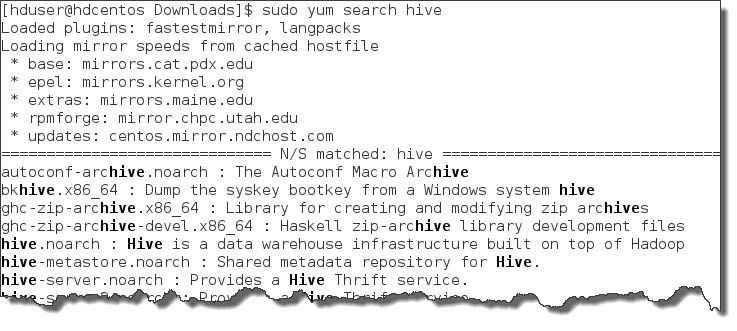
This command should list numerous messages that indicate that we have access the packages that make up Hive. Next, check for the software builders:
sudo yum list ant make maven
sudo yum list gcc gcc-c++
sudo yum list openssl
sudo yum list libxml2-devel libxsit-devel
sudo yum list libsqlite-3.devel libldap2-devel
Time to install our Java Developers Kit. To determine what version of Java
you are using, call java with the -version
command line option to the tool:
java -version
This will return something like this:

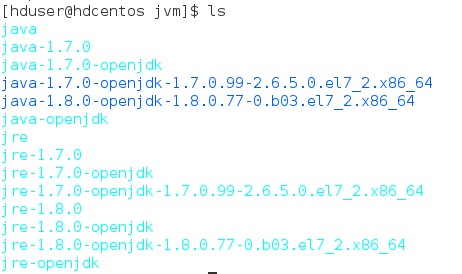
Look at the contents of the /usr/lib/jvm directory.
cd /usr/lib/jvm; ls

This directory listing shows that there are two JDKs; version 1.7 and 1.8 and they are both from OpenJDK. Let's search for the Java Developers Kit.
yum search java-1.7.0
This returns the following output:
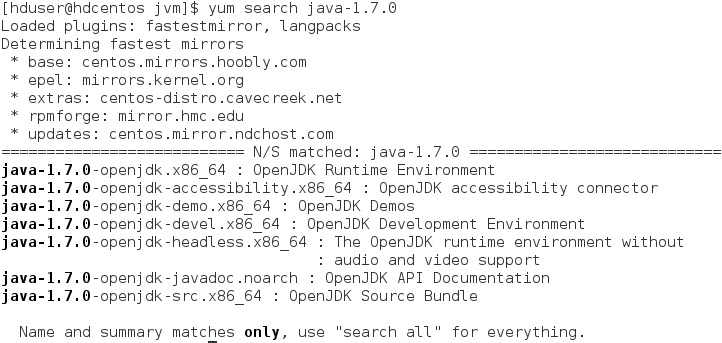
It is available. Let's install the developer's kit. Determine the
correct package for your operating system. The difference is normally
between a 32-bit and 64-bit architecture. The 64-bit is always noted as
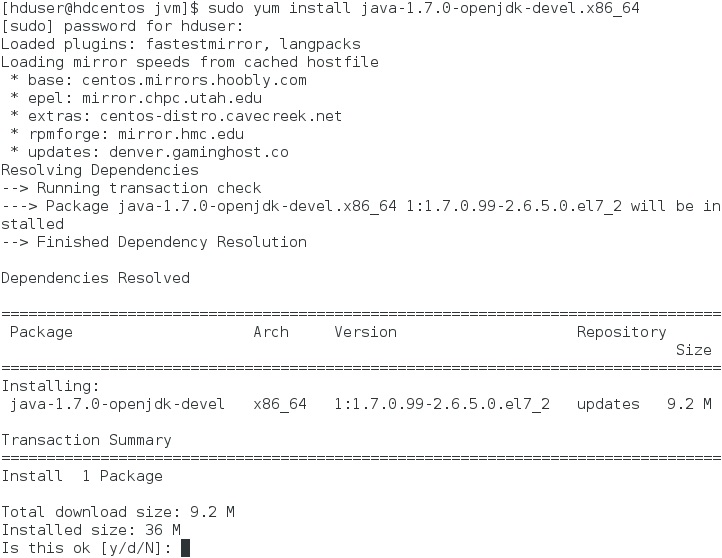
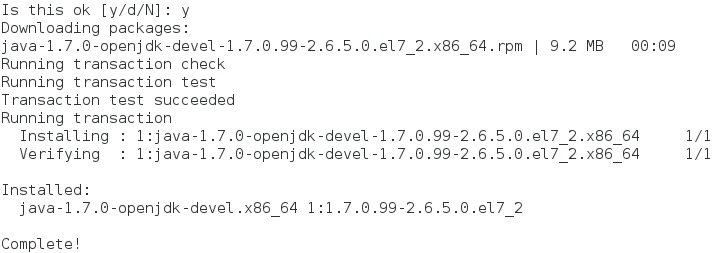
x86_64. We will use yum to install it.
sudo yum install java-1.7.0-openjdk-devel.x86_64
Let us list the contents of the newly installed java developers kit.
Look at what is in the java-1.7.0-openjdk-1.7.0.99-2.6.5.0.el7_2.x86_64 directory.
ls java-1.7.0-openjdk-1.7.0.99-2.6.5.0.el7_2.x86_64/

We are checking to make sure there is a bin, include, and lib directory. In this example, they are all present and accounted for. Let's take a closer look at the bin directory:
cd java-1.7.0-openjdk-1.7.0.99-2.6.5.0.el7_2.x86_64/
ls bin

We now have access to the java, javac and jar commands.
Next, we need to create a symbolic link from the /usr/lib directory to the /usr/lib/jvm/java-1.7.0-openjdk-1.7.0.99-2.6.5.0.el7_2.x86_64/ directory. We will put this symbolic link in /usr/lib/java directory. First, need to make sure that /usr/lib/java is available.
cd /usr/lib
ls
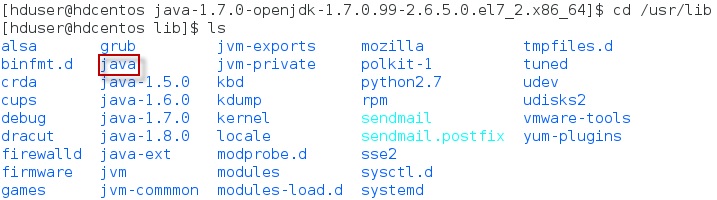
There is directory called java. Check to make sure it is empty.
ls java
The java directory is empty. It is safe to remove it. Once it is gone, create the symbolic link.
rmdir java
sudo ln -s /usr/lib/jvm/java-1.7.0-openjdk-1.7.0.99-2.6.5.0.el7_2.x86_64/ /usr/lib/java
Now check the symbolic link.
cd /usr/lib/java
ls

As you can see, we have the necessary binaries to support our Software
Developers Kit. Once the JDK is installed, we need to set the JAVA_HOME path. We'll cd to the home directory and we're going to edit the .bashrc file.
cd ~
vi .bashrc
This file should look familiar since we edited it earlier.
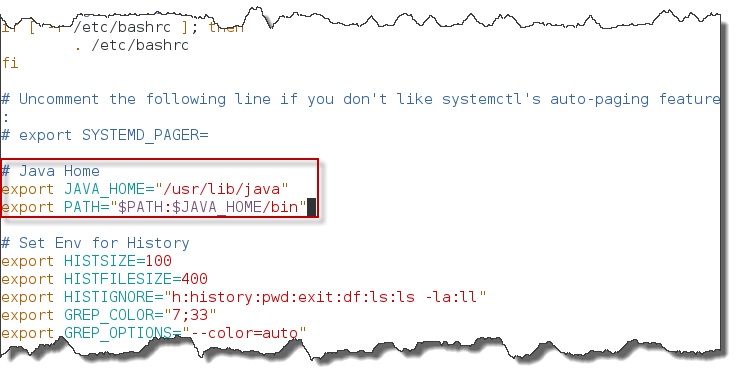
Anywhere after the call to /etc/bashrc, add the following:
# Java Home
export JAVA_HOME="/usr/lib/java"
export PATH="$PATH:$JAVA_HOME/bin"
Close the .bashrc script file by saving it and quiting the editor (:wq). Now we need to source the .bash_profile script file to pick up the changes and inspect the JAVA_HOME value:
source .bashrc
echo $JAVA_HOME

Can we execute the javac command?
javac
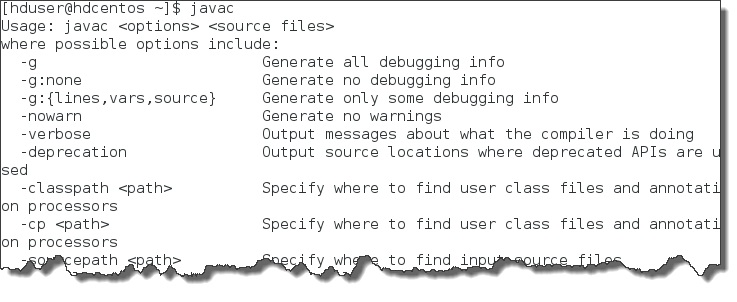
Although javac error'd out, the fact we found and executed it is what we were looking for. We now know that the JDK is installed and the JAVA_HOME path tested. We have successfully installed the JDK and set up JAVA_HOME. Our environment is ready.
hostname
Now, we are going to configure a host name for our system. We configure the host name for our convenience. This will affect parameters in our Hadoop configuration files and it will affect our filenames for our logs.
To configure the hostname on CentOS 6, there needs to be a change to the
/etc/hostname configuration network file and the
/etc/hosts file. This is followed by a reboot of our virtual
machine to ensure we set the hostnames correctly. By using the hostname
commands, you can see that our current host is set to
localhost.localdomain. Use the instructions on the CentOS Linux page to change the
host name to hdcentos.
SSH Configuration
We are going to conigure SSH to allow system access without requiring a password. This SSH configuration is required to allow the different Hadoop nodes to communicate with each other.
Now we will create a new open SSL key pair with the ssh-keygen
command. We will use the key-type rsa and we will set it with
an empty password.
ssh-keygen -t rsa -P ''

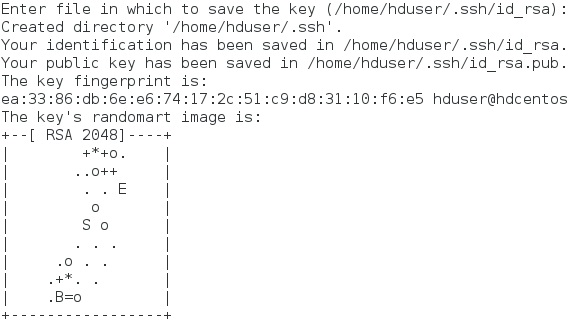
The keys should be created. Let's check...
cd /home/hduser
ls .ssh

We've now created our public and private keys. You can see the private
key, id_rsa and the public key with a
id_rsa.pub. Now we need to create the authorized key-list.
We're going to do so by copying the public key.
cp .ssh/id_rsa.pub .ssh/authorized_keys
And finally, we will now establish our password connections, first for the local host.
ssh localhost


Now we need to test it.
exit

ssh localhost

exit

ssh hdcentos


exit

ssh hdcentos

We have now tested that the Hadoop nodes will be able to communicate with each other.
exit
Installing Hadoop
Run yum to install hadoop and hadoop client.
sudo yum install hadoop
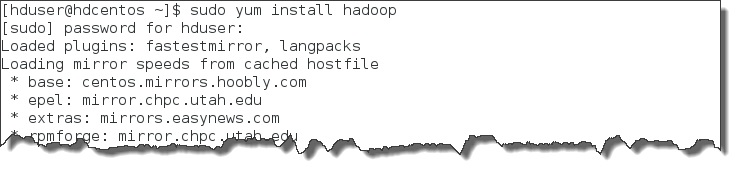

sudo yum install hadoop-client

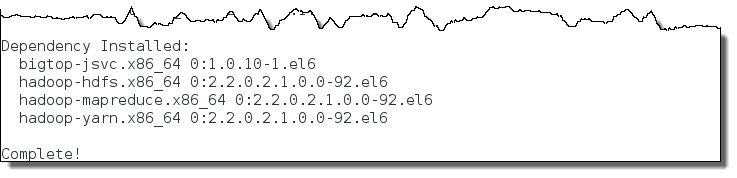
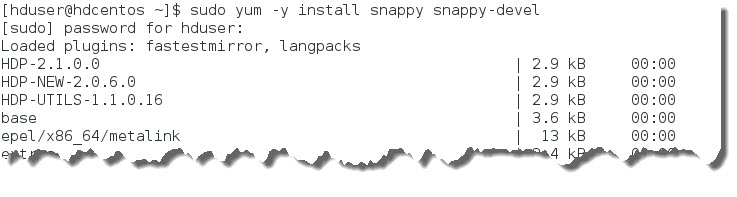
We have now successfully installed the Hadoop core, Hadoop YARN, Hadoop MapReduce, Hadoop HDFS and the Hadoop Client. You will also want to install the compression libraries. We are going to install Snappy and LZO. We will not use this during this learning path. But you will certainly want access to them in the future.
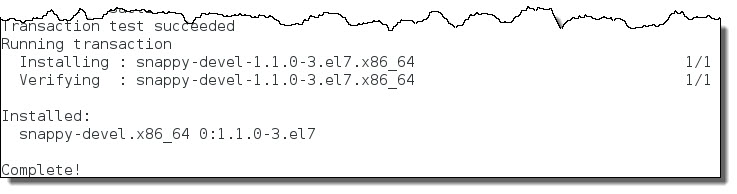
sudo yum -y install snappy snappy-devel
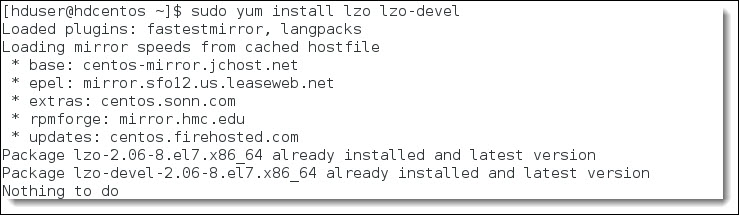
sudo yum -y install lzo lzo-devel
A standard sysadmin best practice is to put in symbolic links to the code trees. This allows for future upgrades and version-specific changes to your Hadoop ecosystem without having to modify all of our configuration files. We are going to use a localized standard of user hdeco for our operational directory. Other common standards include user local opt or even opt itself.
sudo mkdir /usr/hdeco
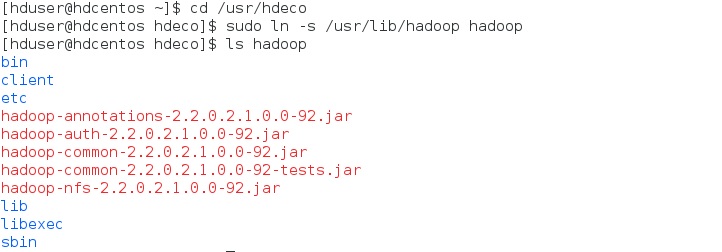
We will create a symbolic link in the operational directory for the Hadooop core code which is located in /usr/lib directory. Then we will test to make sure we have access.
cd /usr/hdeco
sudo ln -s /usr/lib/hadoop hadoop
ls hadoop
We now have our working symbolic link for our operational code. Next, we need to configure access for our Hadoop conf directory. This directory stores all of the configuration files we will need for setting up Hadoop. These files are located in /etc/hadoop.
cd /etc/hadoop
ls -l

Notice that there are two directories in /etc/hadoop. One is a symbolic link to /etc/alternatives and the other is called conf.empty. The conf.empty directory actually contains the configuration files. It makes life much easier if we change the ownership of the conf.empty directory and the configuration files to allow read/write permissions by our user hduser. We must execute this change on conf.empty. Do not make the mistake of executing the ownership change on /etc/hadoop/conf.
sudo chown -R hduser:hadoop /etc/hadoop/conf.empty
ls -l conf
ls -l conf.empty
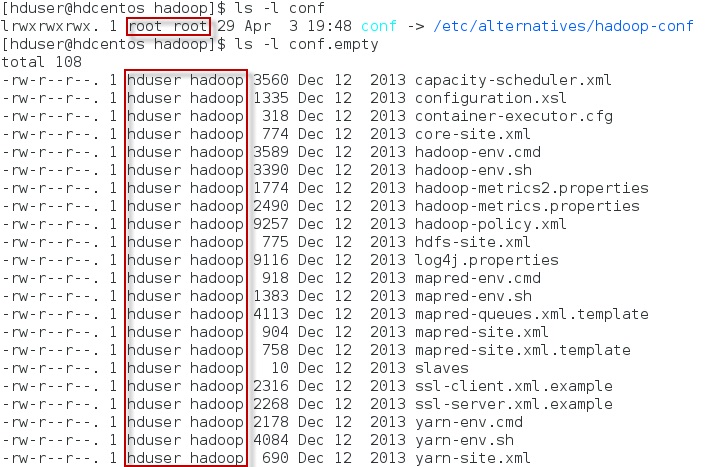
By reviewing the last image, the ownership of the conf directory remains root:root. All of the files in conf.empty now belong to hduser:hadoop. Now it is time to create a working directory for Hadoop in our home. The purpose of this working directory is to make it easier for us to administer and operate Hadoop. As we add more and more components to our Hadoop eco system, you will see the advantage of having a centralized set of working directories in our home. First, let's make one for Hadoop:
cd /home/hduser
mkdir hadoop
The last step is to gain access to the hadoop configuration files from our working directory for Hadoop.
cd hadoop
ln -s /etc/hadoop/conf conf
cd conf
ls -l
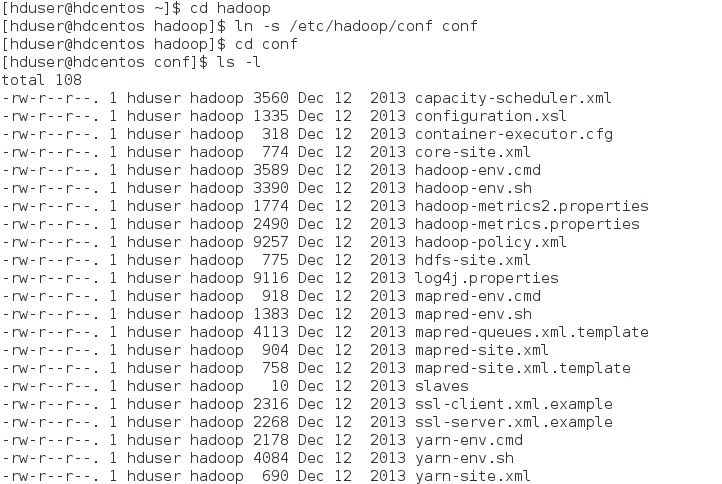
touch test
ls
rm test
Here is another small improvement to reduce clutter. We don't need the .template and .example files in the beginning, nor do we need the .cmd or and .bat files as those are specific to the Microsoft environment. You may safely remove all these files.
rm *cmd *.template *.example
We have now reduced some of the clutter. We have now successfully configured our file system.
Configuring the Hadoop Environment
Let's take a moment and explore our Hadoop installation. We want to understand the structure of this code tree. Let's change directory to our operational directory for Hadoop.
cd /usr/hdeco/hadoop; ls
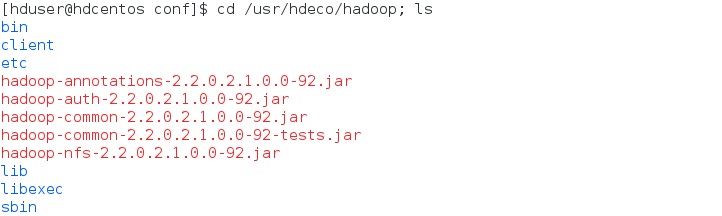
Notice the location of the jar files. This is one of subtleties that can change from distro to distro. So you want to hunt them down early and note their locations. Next, notice there is a bin and sbin directory.
The bin directory is storing files used in the Hadoop operations, such as the Hadoop command itself.
The sbin directory is storing sysadmin scripts for our Hadoop cluster, such as hadoop-daemon.sh for starting and stopping the Hadoop daemons. Now, a common practice for most distros is to place a copy of the binaries in the /usr/bin. You need to check /usr/bin to ensure this is true as not all distros follow this convention. This will greatly impact our configuration of the path of environmental variables.
ls /usr/bin/hadoop
ls /usr/bin/hdfs

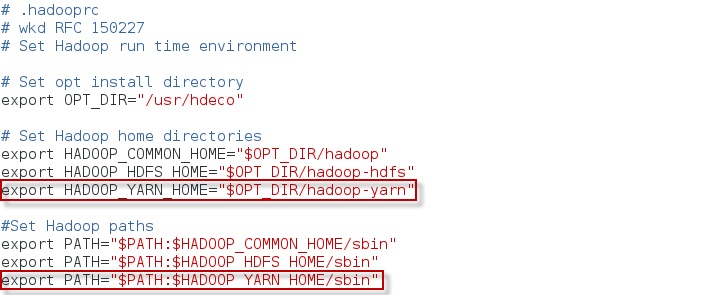
We see that we have the command hadoop and hdfs in /usr/bin. This shows that the yum installer is placing all the binaries into /usr/bin. While we could put all of the environmental variables we use to configure Hadoop into the .bashrc file, it is a common practice to create a separate runtime file. I like to use a file I call .hadooprc. The logic allows you to have multiple runtime files with different configurations and then to fluidly switch between them. Before creating our Hadoop runtime, we need to call it. And we need to do this in the .bash runtime shell itself. Let's check by going back to our home directory.
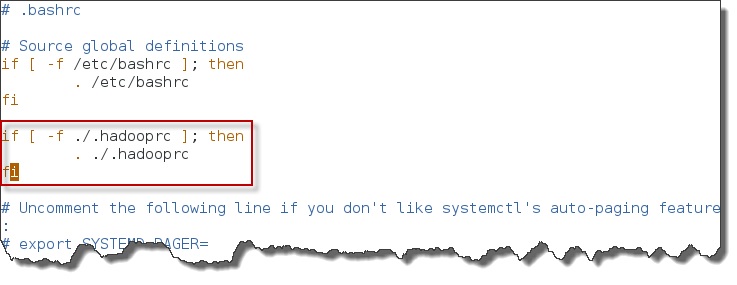
cd
vim .bashrc
Modify the .bashrc file to check to see if .hadooprc exists, and if it does exist, to execute it.
Now let's check the .hadooprc file itself.
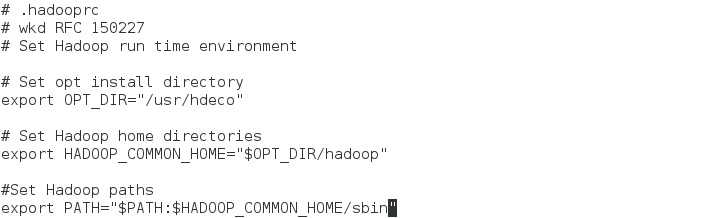
vim .hadooprc
Create the .hadooprc file so it matches this:
source .bashrc
echo $PATH

As illustrated, the hadoop/sbin path has been added to our list. To validate that we have installed our Hadoop core correctly we can check by running the Hadoop command itself and ask for the Hadoop version.
hadoop version

We have installed the Hadoop core correctly and have access to the Hadoop core command. The final step is to update the documentation. Open your browser and create bookmarks to the following links:
- http://hadoop.apache.org
- http://hadoop.apache.org/docs/r2.6.0/
- https://docs.hortonworks.com/HDPDocuments/HDP2/HDP-2.2.0/index.html
Configuring HDFS
It is time to set up HDFS. We will check for the install of the required packages.
sudo yum list hadoop-hdfs hadoop-libhdfs
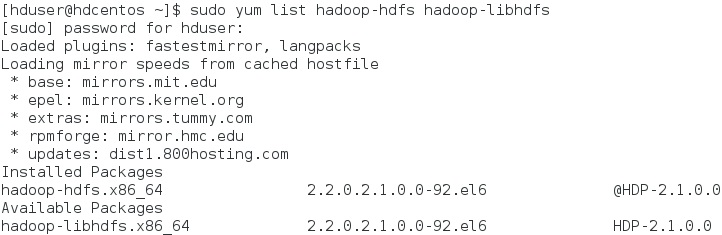
The packages are present. Next, we want to add an operational directory and add a symbolic link to the base code.
cd /usr/hdeco
sudo ln -s /usr/lib/hadoop-hdfs hadoop-hdfs
ls hadoop-hdfs
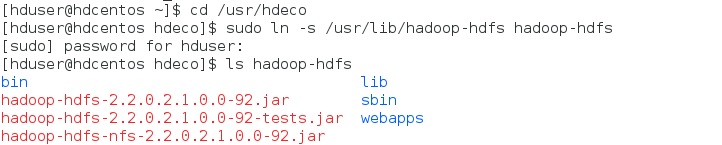
We now have access to the jar files. Time to check our configuration files.
ls -l /etc/hadoop/conf.empty
All of the files have the right ownership of hduser:hadoop.
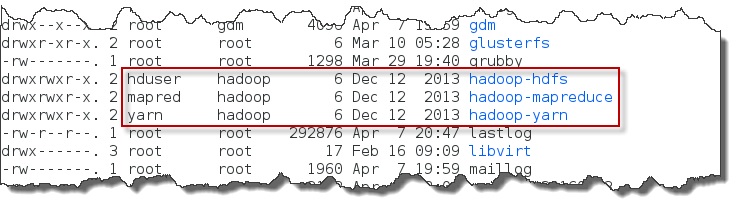
However, when we look at the /var/log directory, we see the
ownership going to different IDs.
ls -l /var/log
ls -l /var/run
Note: There may be a deviation at this point. Recently, there
has been a change to the way /var/run is defined. It is
possible for the directory /var/run to be a symbolic link
to /run. If the previous ls -l /var/run
command returned the following:
lrwxrwxrwx. 1 root root 6 Dec 18 16:10 /var/run -> ../run
/run.
However, it is also possible for the /run directory to be
handled by tmpfs. This means that nothing persists between reboots of
system. The directories would need to be redefined everytime it rebooted.
Therefore, it is necessary to create the directories at boot time using
the systemd services.
To fix the issue of the /run directory being moved and the
directories not persisting, create a file called hadoop.conf
and place it in the /etc/tmpfiles.d directory. This will
automatically create the directories every time it boots.
#*****************************************************************************
#* hadoop.conf                                                               *
#* This is a tmpfiles.d configuration file used to create the necessary      *
#* directories for a Hadoop installation.  This is done because the          *
#* directory /var/run was moved to /run and the /run uses tmpfs which does   *
#* not persist.                                                              *
#*****************************************************************************
d /run/hadoop-hdfs 0775 hduser hadoop
d /run/hadoop-yarn 0775 hduser hadoop
d /run/hadoop-mapreduce 0775 hduser hadoop
  sudo chown -R hduser:hadoop /var/log/hadoop-hdfs
  sudo chown -R hduser:hadoop /var/run/hadoop-hdfs
  ls -l /var/log
  ls -l /var/run
  cd
  clear
  cd hadoop
  mkdir log
  cd log
  ln -s /var/log/hadoop-hdfs hdfs
  cd ..
  mkdir run
  cd run
  ln -s /var/run/hadoop-hdfs hdfs
  ls
  cd /usr/lib/hadoop-hdfs
  sudo ln -s /usr/lib/hadoop/libexec libexec
  ls
  cd /var/db
  sudo mkdir hdfs
  sudo chown -R hduser:hadoop hdfs
  cd
  cd hadoop
  ln -s /var/db/hdfs hdfs
  cd hdfs
  mkdir namenode datanode checkpoint
  ls
  cd
  vim .hadooprc
Add the two highlighted lines to the .hadooprc file.
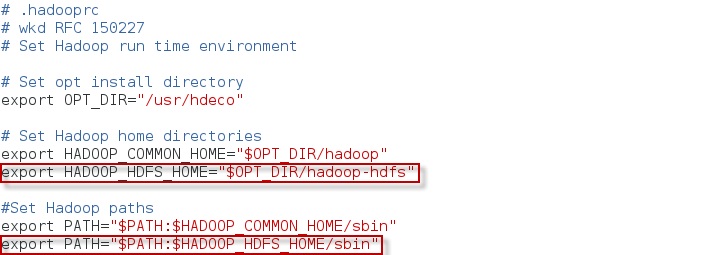
source .hadooprc
cd hadoop/conf
vim hadoop-env.sh
When you are editing this file, search for LOG_DIR.
/LOG_DIR
Make sure the highlighted line is commented out.
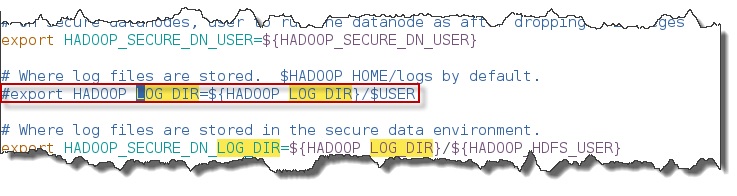
And add the highlighted line.
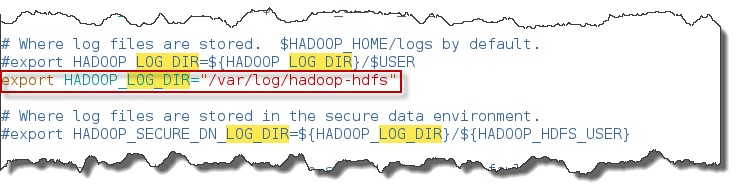
Make sure the highlighted line is commented out.

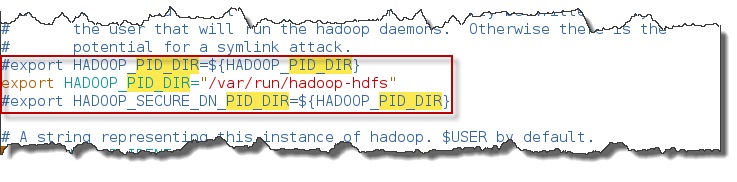
Search for PID_DIR.
/PID_DIR
Change the two highlighted lines. This is the original.

This is the new lines.
Save the file and exit from vim. Next, edit the core-site.xml file.
vim core-site.xml
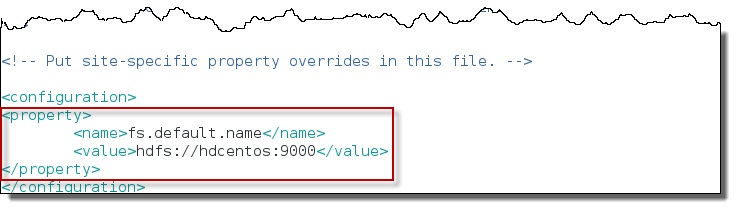
vim hdfs-site.xml
Add the highlighted lines.
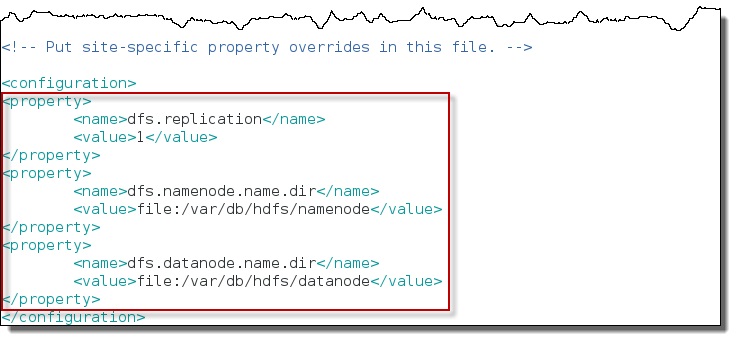
Save the file and exit from vim. Next, it is time to issue a format command.
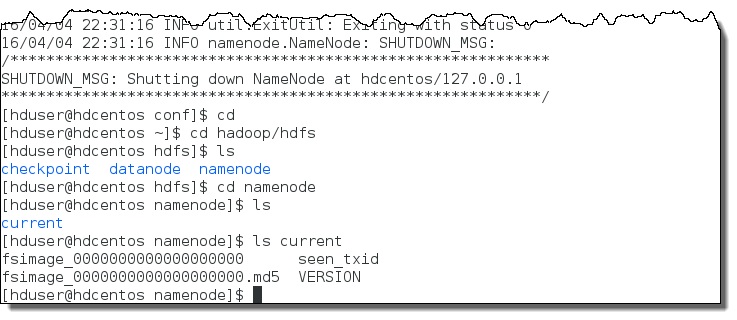
hdfs namenode -format
We have successfully formatted our HDFS file system.
cd
cd hadoop/hdfs
ls
cd namenode
ls
ls current
Starting/Stopping HDFS
In distributed mode and pseudo-distributed mode, the processes run long running daemons. They must be started and stopped.
Note: The script hadoop-daemon.sh exists in the /usr/hdeco/hadoop/sbin/ directory.
cd hadoop
hadoop-daemon.sh start namenode
If an error should occur concerning the log directory:
mkdir: cannot create directory '/usr/log': Permission deniedPlease see issue resolution to possibly fix the problem.
If an error should occur concerning the run directory:
mkdir: cannot create directory '/var/run/hadoop-hdfs': Permission deniedPlease see issue resolution to possibly fix the problem.
hadoop-daemon.sh start namenode
jps

hadoop-daemon.sh start datanode
hadoop-daemon.sh start secondarynamenode
jps
We will now validate that we have access to HDFS by listing the contents of the root directory.
hdfs dfs -ls /

This output is expected. Another thing we must do is check all the log files for error messages. All error messages must be corrected before moving forward.
cd
cd hadoop/log/hdfs
ls
grep ERR *

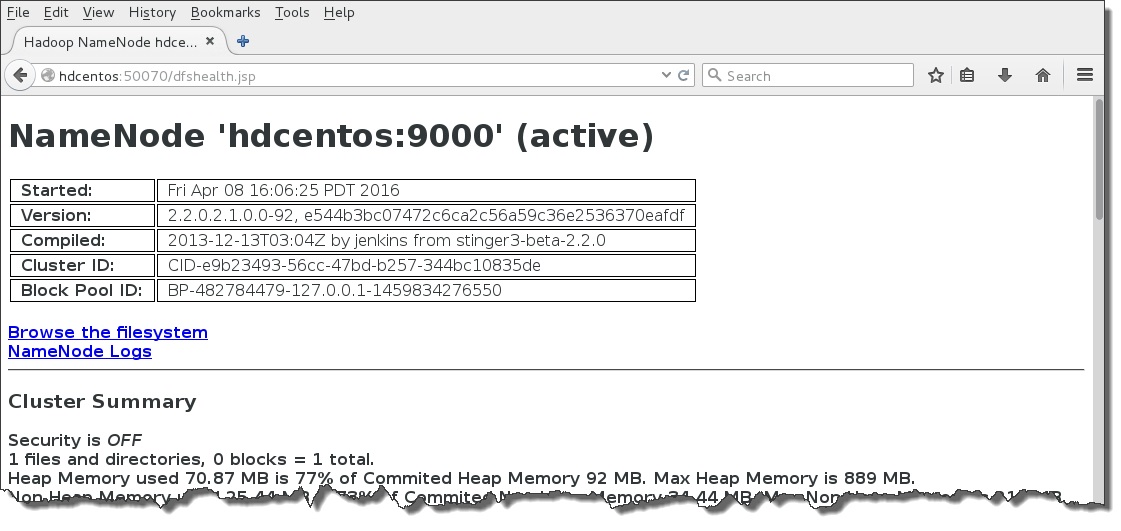
There are a couple of error messages, but these are from an earlier run and do not reflect the current environment. Next, lets check the webserver. Open your web browser and use the following URL:
http://hdcentos:50070
It is up and running.
You can close the browser. Now let's see if the processes can be shut down.
hadoop-daemon.sh stop secondarynamenode
hadoop-daemon.sh stop datanode
hadoop-daemon.sh stop namenode
jps
We've had a clean shutdown. Let's look at a few things.
cd /usr/hdeco/hadoop/sbin
ls
vim hadoop_daemon.sh
The script hadoop_daemon.sh is a standard UNIX shell script. You can search for things such as the namenode (/namenode). The scripts is fairly easy to read and is well documented. The variable explanations are clear. Exit out of VIM. Now we will bring the nodes back online.
cd
cd hadoop
hadoop-daemon.sh start namenode
hadoop-daemon.sh start datanode
hadoop-daemon.sh start secondarynamenode
jps
Configuring YARN
yum list hadoop-yarn
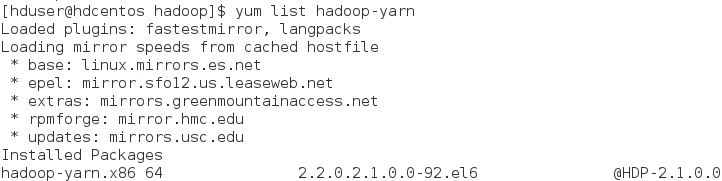
The package is installed. Next, we will create the operational soft link to our code tree.
  cd /usr/hdeco
  sudo ln -s /usr/lib/hadoop-yarn hadoop-yarn
  ls hadoop-yarn
  cd
  sudo chown -R hduser:hadoop /var/log/hadoop-yarn
  sudo chown -R hduser:hadoop /var/run/hadoop-yarn
  ls -l /var/log
  ls -l /var/run
  cd /usr/lib/hadoop-yarn
  sudo ln -s /usr/lib/hadoop/libexec libexec
  ls
  cd
  cd hadoop
  ln -s /var/log/hadoop-yarn log/yarn
  ln -s /var/run/hadoop-yarn run/yarn
  ls log
  ls run
  cd
  vim .hadooprc
Add the two highlighted lines to the .hadooprc file.
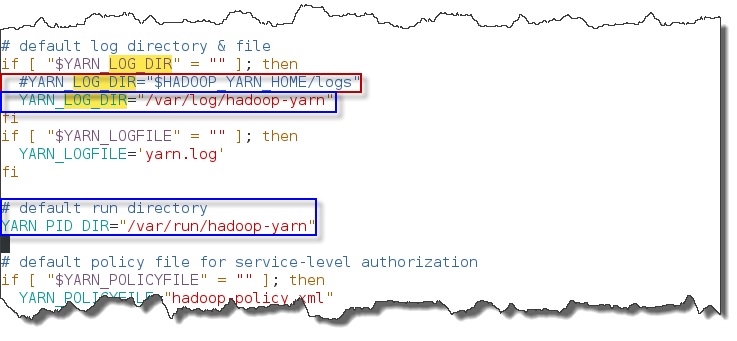
source .hadooprc
cd hadoop/conf
vim yarn-env.sh
Comment out the line highlighted in red. Add the lines that are highlighted in blue.
vim yarn-site.xml
Add the following items to the configuration file:
  <property>
        <name>yarn.resourcemanager.address</name>
        <value>hdcentos:8032</value>
  </property>
  <property>
        <name>yarn.resourcemanager.scheduler.address</name>
        <value>hdcentos:8030</value>
  </property>
  <property>
        <name>yarn.resourcemanager.tracker.address</name>
        <value>hdcentos:8031</value>
  </property>
  <property>
        <name>yarn.nodemanager.aux-services</name>
        <value>mapreduce_shuffle</value>
  </property>
  <property>
        <name>yarn.nodemanager.aux-services.mapreduce.shuffle.class</name>
        <value>org.apache.hadoop.mapred.ShuffleHandler</value>
  </property>
  <property>
        <name>yarn.application.classpath</name>
        <value>.,/usr/hdeco/hadoop/*,/usr/hdeco/hadoop/lib/*,/usr/hdeco/hadoop-h
        dfs/*,/usr/hdeco/hadoop-hdfs/lib/*,/usr/hdeco/hadoop-yarn/*,/usr/hdeco/hadoop-ya
        rn/lib/*,/usr/hdeco/hadoop-mapreduce/*,/usr/hdeco/hadoop-mapreduce/lib/*</value>
  </property>
Starting and Stopping YARN
Note: The script file yarn-daemon.sh is located in the /usr/lib/hadoop-yarn/sbin directory.
  cd
  cd hadoop
  yarn-daemon.sh start resourcemanager
  jps
  yarn-daemon.sh start nodemanager
  jps
  cd log/yarn
  ls
  grep ERR *
  cd ..
  yarn-daemon.sh stop nodemanager
  yarn-daemon.sh stop resourcemanager
  jps
  yarn-daemon.sh start resourcemanager
  yarn-daemon.sh start nodemanager
  jps
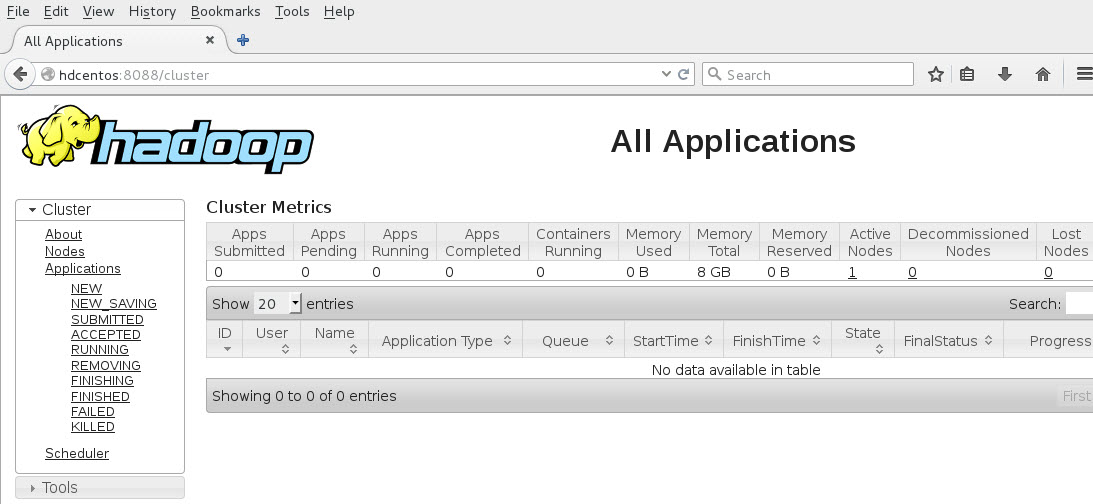
Next, lets check the webserver. Open your web browser and use the following URL:
http://hdcentos:8088
It is up and running.
Configuring Mapreduce
Now comes the time to install and configure the last functional area of Hadoop. This is Mapreduce. Let's first check to see if we already have the Mapreduce package.
sudo yum list hadoop-mapreduce
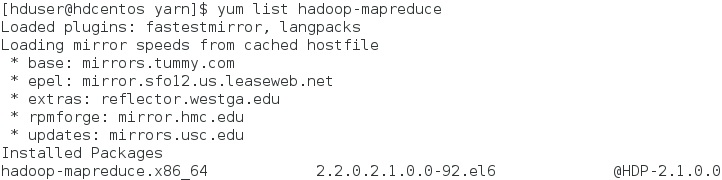
It appears that the package is present. Next, we are going to go our operational directory and install a softlink to our codetree.
cd /usr/hdeco
ls

sudo ln -s /usr/lib/hadoop-mapreduce hadoop-mapreduce
ls hadoop-mapreduce
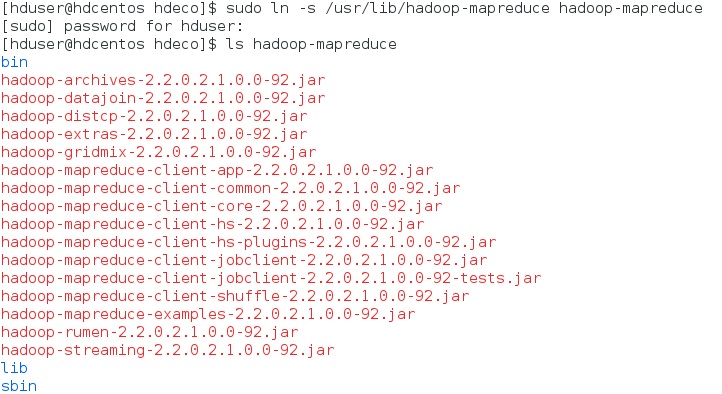
We have access to all of the hadoop mapreduce jar files that we will need. Next, we need to change the ownership on the log and run directories.
sudo chown -R hduser:hadoop /var/log/hadoop-mapreduce
sudo chown -R hduser:hadoop /var/run/hadoop-mapreduce
cd /usr/lib/hadoop-mapreduce
sudo ln -s /usr/lib/hadoop/libexec libexec
ls
cd
cd hadoop
ln -s /var/log/hadoop-mapreduce log/mapreduce
ln -s /var/run/hadoop-mapreduce run/mapreduce
ls log
ls run
cd
vim .hadooprc
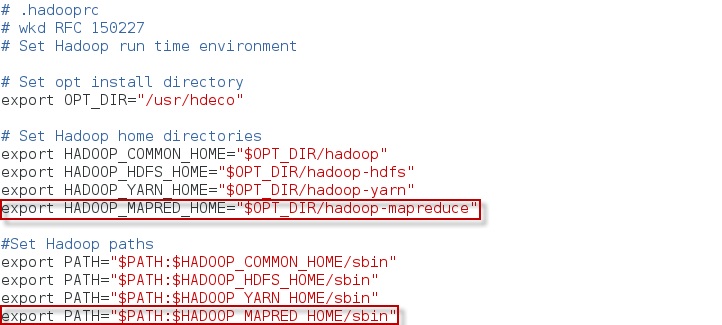
Add the two highlighted lines to the .hadooprc file.
source .hadooprc
cd hadoop/conf
vim mapred-env.sh
Make sure the two highlighted lines are present.

vim mapred-site.xml
Modify the xml file to contain the following two properties:
  <property>
        <name>mapreduce.framework.name</name>
        <value>yarn</value>
  </property>
  <property>
        <name>mapreduce.jobhistory.address</name>
        <value>hdcentos:10020</value>
  </property>
Save the xml file. The next step is to start and stop the mapreduce history server.
mr-jobhistory-daemon.sh start historyserver
jps

Automation
We need to create a shell script to bring up all of the servers required by Hadoop in the future. Do the following from the hduser account:
cd /home/hduser
vi starthadoop.sh
Type the following into the file:
hadoop-daemon.sh start namenode
hadoop-daemon.sh start datanode
hadoop-daemon.sh start secondarynamenode
yarn-daemon.sh start nodemanager
yarn-daemon.sh start resourcemanager
mr-jobhistory-daemon.sh start historyserver
jps
Save the file. Now, when the shell script is invoked, all services related to Hadoop will start:
./starthadoop.sh
First Use of HDFS
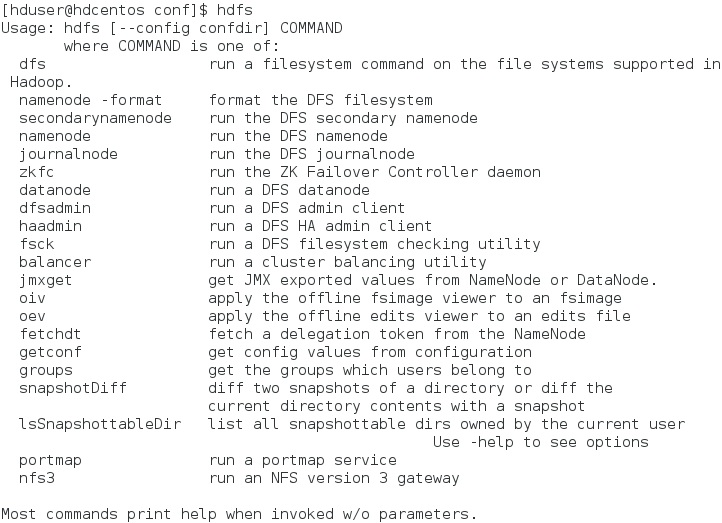
To view the help for the hdfs command, use:
hdfs
To list out the hdfs root directory, use the following command:
hdfs dfs -ls /

We need to create a /user directory:
hdfs dfs -mkdir /user

hdfs dfs -mkdir /user/hduser
hdfs dfs -mkdir /user/hduser/dvd
We have a key-value pair file in the /home/hduser/data
directory called KeyValuePair.txt. We will now copy that file
to the hdfs system.
hdfs dfs -put /home/hduser/data/KeyValuePair.txt dvd/KeyValuePair.txt
hdfs dfs -ls /user/hduser/dvd     or
hdfs dfs -ls dvd
hdfs dfs -cat /user/hduser/dvd/KeyValuePair.txt | more    or
hdfs dfs -cat dvd/KeyValuePair.txt | more

We have now uploaded our first data file into HDFS.
First Use of WordCount
The first MapReduce program student's learn is WordCount. It is included in the example jar files with Hadoop MapReduce. We need to change directories back to our shortcut directory to reach the MapReduce jars.
cd /usr/hdeco/hadoop-mapreduce
Now we will run our first MapReduce job. We will start with the hadoop command, then will will input the jar subcommand, then we will identify the correct jar file to run, and finally we will call out the class within the jar. And in this case, we need to include the input file and the output directory. Using my convention, I always put the out file as the same directory as the input file. I name the output directory out. This keeps things neat and tidy as you run more and more jobs.
hadoop jar /usr/hdeco/hadoop-mapreduce/hadoop-mapreduce-examples-2.2.0.2.1.0.0-92.jar wordcount dvd/KeyValuePair.txt dvd/out
We should now check out output.
hdfs dfs -ls dvd/out

Here, you see that we have the _SUCCESS output as well as our
-r-00000 file. We can now list out the contents of this
part file.
hdfs dfs -cat dvd/out/part-r-00000 | more
Note: Hadoop will not write to an output directory that already exists. Before running a script, check to see if the output directory already exists and, if it does, move that directory to another location. You can also delete the output directory by typing the following command:
hdfs dfs -rm -r dvd/out

You have now run your first MapReduce job.